Tool solutions for glass beadmakers making large hole beads
Are you working with heavy mandrels to make large hole beads? When I started making large hole beads, I went on a search for light weight mandrels for glass beadmakers working in the center of mandrels.
Exploring options became expensive as I purchased available solutions in the glass community. So, to save you money and time, here are things I tried and finally found that satisfied my needs.
My Beadmaking Issues
There’s a couple of issues I discovered trying to make large hole beads.
1. Wide, solid mandrels are too heavy for holding a long time.
2. There were few options for glass beadmakers working in the center of a mandrel.
Beadmakers Folly: I Gotta Have It
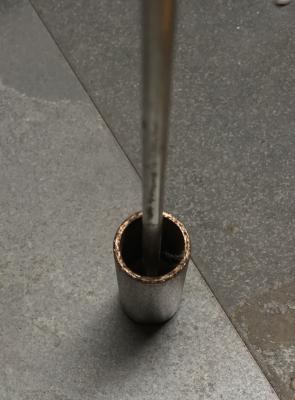
I took a class on big hole beads. My teacher used this type of mandrel (below) for his big hole beads. Though I usually worked in the middle of the mandrel, he made using this type of mandrel look so easy to use. I figured I’d give it a try.
Pros & Cons
Pros #1. The center was hollow, creating a lighter weight mandrel for us weaker armed beadmakers.(me)
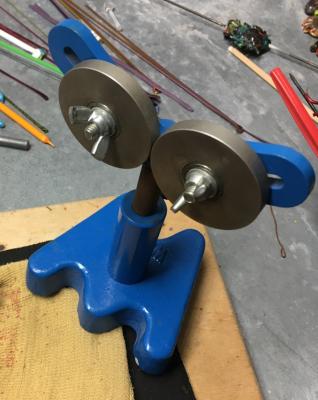
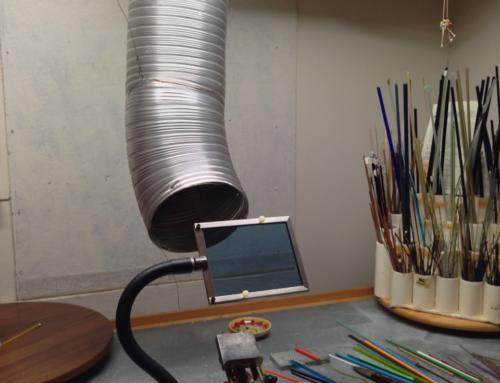
Pros #2. He used this tool (Steady Rest Support Rollers-$115) to balance the weight on the end and easily rotate the bead in the flame while pausing or doing repetitive techniques. (like dots or raking) Looked like a great idea. Of course, I couldn’t live without one!
Cons #1. I realized, at home, my teacher’s arms definitely got more exercise than mine being a glass blower, too. I couldn’t handle the heavy end weight of the mandrel for more than 30 minutes. Beads took at least an hour to make. (I should have taken into consideration that a guy has more strength than most girls, even if I work in my gardens hauling dirt!
Cons #2. The resting tool did not fit my method of working glass. I was too used to using the center of the mandrel which allowed me to constantly move the bead around to get at all angles while I torched. It was in the way most of the time. But, if you do production beads, it would work great!
The Search for More Mandrel Options
Onward with my exploring, I checked out glass suppliers online like Arrow Springs, Ed Hoy, Frantz, & Wale Apparatus for stainless steel tubing. I bought my tubes 25 years ago but I found some on Arrow Springs site currently. They are thinner than mine, tho.
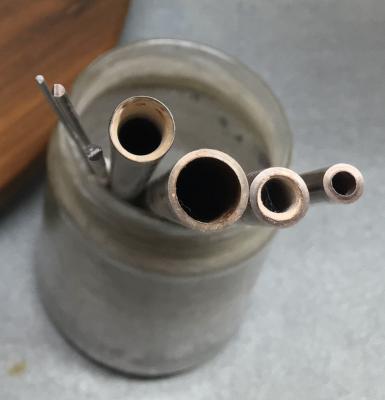
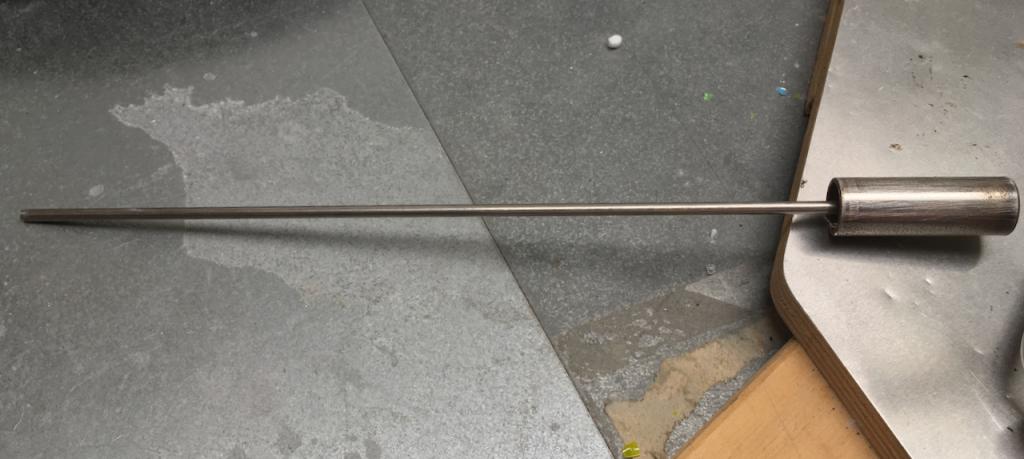
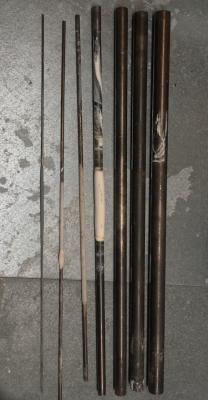
My tubing sizes are 1/4, 3/8, 1/2 inches with a wall thickness of 3/64″. (Right 3 rods in pic) Far left rod has a thinner wall thickness of 1/64″.(problems with thinner wall)
Another option is to contact metal supply companies in your town. I purchased my thinner solid core mandrels in bulk from a metal supply place and cut the lengths I wanted. Way cheaper! The 3/32 mandrels bend so easy & become worthless! **Be sure to file the sharp metal edges before use. I use a dremel.**
More Issues
Playing around with these 2 types of tubing mandrels brought different results.
I had some bead breakage which I couldn’t figure out why. Finally, my son who is a Physicist, speculated that the thinner tube mandrel’s wall was cooling faster than the molten glass. This caused thermal shock and cracking. (I tend to listen to my son since I have trouble adding & subtracting.)
To solve the problem, I would have to heat the bead more to keep the core hotter but in the process I would loose floral detail on the surface of the bead.
My solutions was using the thicker tubing mandrels which made it easier to maintain the same temperature between the glass & tubing. If the tube’s wall is too thick, uneven cooling would also be created. Of course, that also depends on the thickness of the bead.
Second Issue
Repeated usage of the tube mandrels required redipping into the bead release. Unable to clean the inside, the tubing started getting a build up inside the core. Each firing hardened the bead release inside & my smaller tubing filled in eventually. This created a heavier mandrel.

Using masking tape on one end of the mandrel, I was able to dip in the bead release & keep the center empty. Applying the tape each time I dipped and then removing it before I started torching was necessary, but simple to do.
Tips
I sometimes wore gloves if I was going to do a complicated bead that took more than an hour. The extra lining of material helped to insulate my hands from the heat. **Make sure the material is natural, like cotton and grips the mandrel.**
Have you watched my free video on how I get bead release in the center of my mandrels? Find it on my website’s ‘free lampworking videos’. It’ the 4th video on page 3.
Hope I answered your questions, Susan! Remember, this is just my way of lampworking. If anyone has any suggestions, please leave them in the comments below. Sharing uplifts us all!
Patsy

Purchase My Art & Tutorials Here:
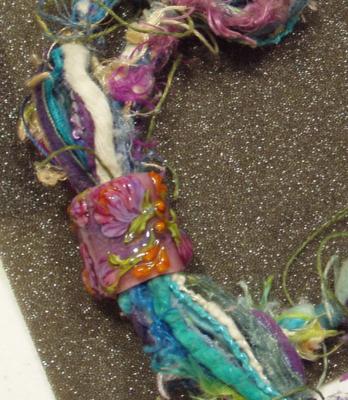
You can buy my gorgeous flower lampwork tutorials on my website – My Tutorials
I design fine art jewelry & beads with my glass – Patsy’s Shop
Patsy, do these tubes not get hot when you hold them?
Lynda, these hollow tubes don’t get nearly as hot as solid tubing would. But, many of my hollow beads are at least an inch long which does put off some heat, especially working in the center of the mandrel tube. I have leather gloves that fit really snug, so my grip on the mandrel is tight. Leather doesn’t catch on fire so my hands are protected. I think I got them at Lowe’s. My mandrels are 11-12 inches long.
Thank you, Patsy!! I did not realize you had answered my question! Quite helpful; I had been using thicker solids mandrel with gloves, but will now try the hollow ones! My husband uses a hack saw to cut and I buff them to make the ends smooth. You can actually find the tubing and various sized rods at Home Depot! Many thanks, again!
Susan
Glad to help, Susan! Sometimes it take a little creativity to work with glass. Just think outside the box! :)